How to Make Stamped Metal Jewelry
Essential Stamping Tools
A well-curated toolkit separates amateur attempts from professional results. Beyond basic letter stamps, invest in specialty shapes - floral motifs, geometric patterns, and custom designs expand your creative possibilities. The anvil-like stability of a cast iron stamping block proves invaluable, especially when working with larger pieces requiring uniform pressure distribution.
Never underestimate the importance of your hammer choice. Jewelers often maintain multiple hammers - a lightweight 4oz mallet for delicate work and a heavier 12oz model for deep impressions. Parallel-jaw pliers with nylon tips prevent marring while providing superior grip during intricate shaping work.
Preparing Your Metal
Surface preparation makes or breaks your final product. After precise cutting with aviation snips (which leave cleaner edges than standard shears), thoroughly degrease with acetone. A final pass with 600-grit sandpaper creates the ideal texture for crisp impressions. This meticulous prep work eliminates 90% of common stamping issues before they occur.
Choosing Your Design
Design development benefits immensely from old-school sketching. Create a mood board of nature photographs, architectural details, and textile patterns to spark inspiration. When planning layouts, remember that negative space often enhances stamped designs as much as the impressions themselves. Pro tip: Photocopy your metal sheet and test stamp arrangements on paper first.
Safety Considerations
Beyond basic eye protection, consider vibration-dampening gloves if doing extensive stamping - they prevent white finger syndrome from repetitive impacts. Always anchor your workbench to prevent shifting during heavy hammering. For ventilation, a simple box fan with a furnace filter taped to the intake side creates an effective DIY fume control system.
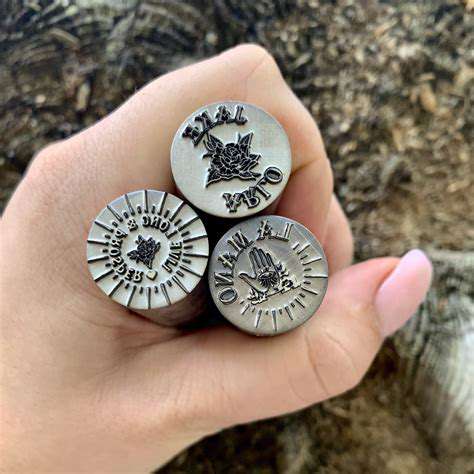
Designing Your Own Metal Stamp Designs
Metal Selection Deep Dive
When prototyping custom stamps, nickel silver offers an ideal balance between hardness and workability. Its 18% nickel content provides excellent durability while remaining machinable with standard tools. For production runs, tool steel (like D2 or O1) withstands thousands of impressions without deformation.
Stamping Process Nuances
The secret to crisp impressions lies in controlled deformation. Progressive stamping - making increasingly deeper passes with the same die - prevents metal fatigue and cracking. For dimensional designs, combining embossing (raised) and debossing (recessed) techniques creates stunning bas-relief effects.
Design Engineering
Counterintuitively, simpler designs often stamp better. Limit intricate details to areas larger than 1mm to prevent tool breakage. Always include registration marks in your design - these alignment guides ensure multi-pass stamps line up perfectly.
Advanced Tooling Techniques
Custom carbide dies, while expensive, pay for themselves in production environments. For one-off pieces, modified center punches can create surprisingly detailed custom stamps when properly hardened and tempered.
Industrial Safety Protocols
Beyond PPE, implement a two-person rule when working with hydraulic presses. Install emergency stop buttons within easy reach of all workstations. Regularly inspect press brake guards and other safety interlocks.
Professional Finishing Methods
Vibratory tumblers with stainless steel media create museum-quality finishes. For art pieces, consider electrochemical polishing - it produces mirror finishes without removing fine details.
Quality Assurance Systems
Implement statistical process control by measuring sample impressions with optical comparators. Maintain a golden sample - a perfect impression used to calibrate tools throughout production runs.
Finishing Your Stamped Metal Jewelry
Metal Preparation Revisited
After stamping, re-anneal work-hardened areas with a micro torch to prevent cracking during final forming. This step proves especially critical for complex fold-formed pieces.
Advanced Stamping Techniques
Experiment with differential stamping - varying pressure across a single design creates dramatic dimensional effects. Using leather or urethane pads under certain areas while stamping produces subtle graduated impressions.
Professional Finishing Touches
For patinas, multiple thin applications create more nuanced colors than single heavy coats. Protect delicate areas with resist pens before applying chemicals. When setting stones in stamped pieces, consider gypsy setting where stones sit flush with hammered surrounds.
Beyond the Basics: Advanced Techniques and Ideas
Hybrid Metal Techniques
Combine stamping with keum-boo (Korean gold bonding) for luxurious accents. The textured surfaces created by stamping actually improve gold adhesion through mechanical bonding.
Digital Integration
Scan hand-stamped pieces to create digital textures for 3D printed molds. This bridges traditional craftsmanship with modern manufacturing.
Structural Innovations
Explore honeycomb stamping patterns - when properly executed, these ultra-light constructions maintain remarkable strength while reducing material use by 40%.
Read more about How to Make Stamped Metal Jewelry