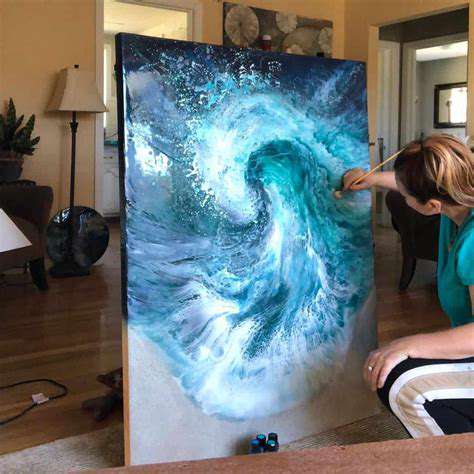
How to Make Resin Jewelry

Resin Selection:
Choosing the right resin type is crucial for achieving the desired outcome. Different resins offer varying properties, like durability, flexibility, and color options. For instance, epoxy resins are known for their strength and versatility, making them suitable for a wide range of applications, from crafting jewelry to creating intricate sculptures. Polyurethane resins, on the other hand, often provide a more flexible and adaptable finish, ideal for projects requiring a certain degree of elasticity.
Understanding the different types of resins and their specific characteristics will help you select the best option for your project. Consider factors like the intended use, the desired aesthetic, and the level of skill you possess when making your decision.
Hardener Ratios and Mixing:
Precise measurements and proper mixing are vital for achieving optimal results with resin projects. Incorrect ratios of resin and hardener can lead to inconsistencies in the final product, affecting its durability and appearance. Following the manufacturer's instructions closely is essential, as the recommended ratios can vary significantly depending on the specific resin type.
Understanding the chemical reaction between the resin and hardener is key to successful mixing. Ensure you work in a well-ventilated area to avoid inhaling any fumes generated during the mixing process. Always use appropriate safety measures, including gloves and eye protection.
Pigments and Colorants:
Adding pigments or colorants to your resin can significantly enhance the visual appeal of your projects. From subtle tints to vibrant hues, a wide range of color options are available, allowing for personalization and creativity. Experiment with different shades and combinations to achieve the desired aesthetic.
Ensure that the colorants you choose are compatible with the resin you've selected. Some pigments may not mix well or may affect the final curing process of the resin. Refer to the manufacturer's guidelines for recommendations on compatible colorants.
Tools and Equipment:
A variety of tools and equipment are necessary for handling and working with resin. These include measuring tools for accurate resin and hardener ratios, mixing containers, stirring tools, and molds. Choosing high-quality tools ensures precise measurements and smooth mixing, leading to a more professional-looking finished product.
Proper preparation of molds and working surfaces is also crucial for a successful outcome. Ensure the surfaces are clean and free from any debris that could affect the final product's quality or appearance.
Safety Precautions:
Working with resin requires careful attention to safety precautions. Resins and hardeners can release fumes that are harmful to your health if inhaled or ingested. Always work in a well-ventilated area and wear appropriate personal protective equipment, such as gloves, eye protection, and a respirator, particularly when handling larger quantities of resin.
Proper disposal of resin and hardener waste is also important. Follow local regulations and guidelines to ensure responsible disposal practices.
Molds and Templates:
Choosing the right molds or templates is essential for shaping your resin projects. Different types of molds offer various shapes and sizes, allowing you to create a wide array of designs. From simple shapes to complex sculptures, selecting appropriate molds is essential to achieve the desired results.
Curing and Finishing:
Allowing the resin to cure completely according to the manufacturer's instructions is essential for achieving the desired durability and strength. Proper curing time guarantees a hard, durable, and aesthetically pleasing final product. Different resins have different curing times, so it's important to follow the specific guidelines for the resin you're using.
Following proper finishing techniques can enhance the appearance and protection of your resin projects. Polishing or sealing the finished product can further protect it from scratches and damage.
Mixing and Pouring Resin: Techniques for a Professional Finish
Preparing Your Workspace
A clean and well-organized workspace is crucial for achieving a professional-looking resin pour. Ensure you have a designated area free from dust and debris. A smooth, level surface, like a large, clean table or a resin-specific pouring mat, is essential to prevent air bubbles. Gather all your materials and tools within easy reach to avoid interruptions during the pouring process.
Thoroughly clean all containers, molds, and tools with a suitable cleaner designed for resin. This step is vital to remove any contaminants that could affect the final product. Always follow the manufacturer's instructions for cleaning and preparation.
Measuring and Mixing Components
Precise measurements are critical for achieving the desired consistency and color of your resin. Use calibrated measuring cups and spoons to accurately measure the resin and hardener components. Never substitute components with similar-looking products, as this can lead to inconsistencies and potentially damage the final product.
Stir the resin and hardener components thoroughly, using a clean mixing tool. This ensures that the components are evenly distributed, eliminating the risk of uneven curing or color variations.
Understanding Resin Viscosity
Resin viscosity refers to its thickness or flow rate. Understanding this property is crucial for achieving a smooth and bubble-free pour. Different types of resin have varying viscosities, and the mixing process can significantly affect this characteristic. The viscosity of the resin will also be affected by the temperature of the environment.
Different techniques can be employed to adjust the viscosity, such as using heat to thin the resin or adding specific additives to change its flow characteristics. It is important to research and understand the specific viscosity requirements for your project and the type of resin used.
Pouring Techniques for Smooth Results
Employing the right pouring technique can significantly impact the outcome of your resin project. Pouring slowly and steadily is recommended to minimize the introduction of air bubbles. Pouring the resin in a controlled manner, avoiding sudden movements, helps achieve a smooth and even surface finish.
Use a gentle pouring motion and avoid creating turbulence in the resin. This can be achieved by tilting the container or using a pouring jig to control the flow of resin.
Avoiding Air Bubbles: Crucial for Clarity
Air bubbles are a common problem in resin pours, leading to an undesirable aesthetic. Several techniques can help to minimize or eliminate these bubbles. Using a de-gassing tool or placing the resin in a vacuum chamber can effectively remove trapped air.
Slowly and carefully pouring the resin over the mold or surface minimizes the risk of air entrapment. Adding a de-gassing agent or using a degassing tool before pouring can eliminate air bubbles in the resin.
Post-Pouring Procedures: Essential Steps
After pouring the resin, follow specific post-pouring procedures for optimal results. This includes allowing the resin to cure according to the manufacturer's instructions. Proper curing time is essential for the resin to fully harden and achieve its desired strength and clarity.
Monitor the curing process for any unusual occurrences, such as excessive bubbling or discoloration. If any problems arise, consult the manufacturer's instructions or a professional for guidance.
Troubleshooting Common Issues
Troubleshooting potential issues in a resin pour is an essential skill for any resin enthusiast. Problems like air bubbles, discoloration, or uneven curing can be addressed by implementing specific techniques or adjusting your approach. Understanding the causes of these issues is vital for preventing them in future projects.
Referring to the manufacturer's instructions for the specific resin used, or consulting with a knowledgeable resin specialist, can help in identifying and resolving these common problems.
Tension headaches are one of the most common causes of pain behind the head. They are often characterized by a dull, aching sensation and can be triggered by stress, poor posture, or fatigue. Many people experience tension headaches due to prolonged periods of sitting at a desk or working on a computer.
Finishing Touches and Curing Your Resin Jewelry
Polishing and Finishing
Once your resin jewelry is completely cured, it's time for the finishing touches. Polishing is crucial for achieving a professional and high-quality shine. Using a soft cloth, gently buff the surface of your resin pieces. Avoid using abrasive materials that could scratch the delicate resin, leading to an uneven or damaged finish. A microfiber cloth works wonders for creating a smooth, lustrous surface, and you can even use a polishing compound designed specifically for resin if you need an extra layer of shine. Careful attention to detail during this stage ensures your finished pieces are truly exceptional.
Consider adding a protective layer, such as a sealant or varnish, to further enhance the longevity of your resin jewelry. This extra layer helps to protect against scratches, UV damage, and everyday wear and tear, ensuring your beautiful creations will last for years to come. A clear sealant provides an extra layer of protection while maintaining the natural beauty of the resin.
Curing and Post-Pouring Procedures
Proper curing is essential for the durability and longevity of your resin jewelry. Different resins have varying curing times, so always follow the manufacturer's instructions meticulously. Typically, curing involves placing the resin pieces in a controlled environment, often away from direct sunlight and extreme temperatures. This prevents warping or cracking of the resin and ensures that the polymerization process completes successfully. Curing time can range from a few hours to several days, so be patient and allow the resin to fully cure according to the product specifications.
Troubleshooting Resin Issues
Resin projects can sometimes present unexpected challenges. Air bubbles are a common issue, and careful technique during the pouring process is key to minimizing them. Using a toothpick or a similar tool can help to gently pop any bubbles that do appear on the surface. If bubbles are trapped beneath the surface, consider using a heat gun on a low setting to gently help them rise to the surface. If the resin appears cloudy or uneven, it could be due to improper mixing ratios, incorrect curing conditions, or temperature fluctuations. Careful attention to detail and a thorough understanding of your resin's characteristics can help prevent these issues.
Another possible issue is warping or cracking during the curing process. This is often due to temperature fluctuations or improper support for the jewelry design. Maintaining a consistent temperature during curing and providing adequate support for the project, especially with intricate designs, can help to prevent these problems. Using molds and supports can aid in preventing warping. If you encounter issues, consult the manufacturer's instructions for specific advice and troubleshooting tips.
Finishing Techniques and Aesthetic Choices
Once your resin is cured, the possibilities for embellishment are endless. Adding metallic flakes, pigments, or other decorative elements can elevate your resin jewelry to a whole new level. Experiment with different techniques like embedding small beads, charms, or even dried flowers to create unique and personalized designs. Embellishments can be strategically placed to highlight specific features of your jewelry and create visual interest. Using different colors and textures can add depth and dimension to your resin creations.
Consider the overall aesthetic you're aiming for. A minimalist design might benefit from a simple polished finish, while a more elaborate piece might call for intricate embellishments and textures. Think about the colors and materials you're using and how they interact to create a cohesive and eye-catching design. Your creativity is the key to transforming your resin jewelry into something truly special.
Troubleshooting Common Resin Jewelry Issues
Common Resin Jewelry Problems and Solutions
Resin jewelry can be a rewarding craft, but like any process, it comes with its fair share of challenges. Understanding common issues and their potential solutions can significantly improve your success rate and prevent frustration. From bubbles to discoloration, this section will cover several common problems and practical troubleshooting steps.
Bubbles in Resin Jewelry
Bubbles are perhaps the most common resin jewelry issue. They can ruin the aesthetic appeal of your creations, making them less desirable. Several factors contribute to bubble formation, including improper mixing of resin and hardener, inadequate stirring, or the presence of trapped air during pouring. Employing a thorough mixing technique and ensuring the resin is fully cured can help prevent bubble formation.
Using a vacuum degassing system can also eliminate air pockets, leading to a smoother, more professional finish.
Discoloration of Resin Jewelry
Discoloration in resin jewelry can stem from various sources, including impurities in the resin itself, improper storage of resin materials, or exposure to UV light. Understanding the potential causes will allow you to implement preventative measures. Using high-quality resin and storing it correctly in a cool, dark place can help minimize discoloration.
Additionally, using UV-resistant additives or enclosures can further protect your resin jewelry from fading.
Resin Not Curing Properly
Resin that doesn't cure completely can lead to sticky surfaces and a lack of structural integrity in your jewelry pieces. This problem often arises from inadequate curing times, improper mixing ratios, or using low-quality resin. Following the manufacturer's instructions carefully and using accurate measurements for resin and hardener are crucial for achieving proper curing.
Ensuring sufficient curing time in a controlled environment (away from drafts and extreme temperatures) is also vital.
Cracks and Tears in Resin Jewelry
Cracks and tears in resin jewelry can occur due to stress, improper handling during the curing process, or inconsistencies in the resin mixture. Stress can originate from uneven surface tension during pouring, or from applying pressure or force to the resin while it's still curing. Using a mold that is properly sized and supported, and handling the resin with care can minimize the risk of cracking.
Uneven Texture or Finish
Achieving a smooth and even finish is crucial for aesthetically pleasing resin jewelry. Uneven textures can result from inconsistent resin application, inadequate stirring, or improper mold release. Employing a thorough mixing technique, ensuring even resin distribution, and using appropriate mold release agents can help prevent uneven textures and achieve a more polished look.
Mold Release Issues
Mold release is a frequently overlooked factor that can impact the success of your resin jewelry projects. Inadequate mold release can cause the resin to stick to the mold, leading to difficulty removing the piece. Using a suitable mold release agent, ensuring even application, and properly preparing the mold are essential steps for successful mold release. Many mold release agents are available, and choosing the right one for your project is key to a good result.
Read more about How to Make Resin Jewelry


Hot Recommendations
-
*Best Sci Fi Books to Read in 2025
-
*How to Start a Reading Journal
-
*Guide to Collecting Vinyl Records by Genre
-
*Guide to Self Publishing Your Book
-
*Guide to Reading More Books
-
*How to Solve a Megaminx Fast
-
*Guide to Identifying Edible Plants While Hiking (Use Caution!)
-
*How to Solve a 5x5 Rubik's Cube
-
*Guide to Building Advanced Lego Structures
-
*How to Capture Star Trails Photography