How to Paint Miniatures for Board Games
Before diving into intricate washes, ensuring your miniature's surface is primed and ready is crucial. A smooth, clean base prevents the wash from pooling or clumping, allowing it to flow evenly and create the desired shading effects. Proper surface preparation dramatically affects the final outcome, guaranteeing a professional touch to your miniature masterpieces. Start with a thorough cleaning of the miniature, removing any dust or debris. Then, apply a thin, even layer of primer. Allow ample drying time before proceeding to the wash application stage, ensuring the primer is completely cured for optimal adhesion and a consistent finish.
A well-primed surface will act as a canvas for your washes, promoting a smooth application and preventing the wash from clogging or beading up. This meticulous preparation is the first step in achieving the rich detail you're aiming for in your miniatures. Ignoring this step can lead to uneven washes, ruining the desired effects and potentially compromising the overall quality of your work.
Choosing the Right Wash: A Palette of Options
The wash you select is a vital element in achieving the desired effect. Different washes offer various shades and consistencies. A thin wash, often achieved by diluting the wash with a medium, creates subtle gradations of color, ideal for light highlighting and delicate shading. A thicker wash, on the other hand, offers a bolder, more pronounced effect, suitable for deep recesses and areas requiring a more substantial tone shift. Experimenting with different wash types is essential to understand how each affects the miniature's overall appearance and the level of detail it allows.
Consider the specific details of your miniature when choosing your wash. A wash designed for highlighting might not be suitable for creating deep shadows. A variety of washes, from transparent to opaque, can be used to achieve a wide spectrum of effects. Your creative vision and artistic intent will guide you in selecting the right wash for each specific detail, effectively painting a layered narrative onto your miniature.
Applying the Wash: Techniques for Precision
Applying the wash with precision is key to achieving the desired results. A fine brush, capable of delivering precise control, is essential for delicate work. Employing a light touch is crucial to prevent the wash from pooling or creating unwanted streaks. Start by applying the wash to the miniature's recesses and shadowed areas, allowing the wash to settle into the details. Avoid over-applying the wash, as this can lead to a muddy or uneven appearance.
Work in thin layers, allowing each layer to dry before applying the next. This layering technique ensures the wash blends seamlessly and creates a smooth transition between colors and tones. By controlling the application of the wash, you can precisely define the miniature's features and enhance the overall impact of the paint job.
Controlling the Flow: Avoiding Unwanted Results
Controlling the flow of the wash is crucial for avoiding unwanted results. A steady hand and a light touch are essential to prevent the wash from running or bleeding into unintended areas. Using a brush with a good point helps to precisely target areas needing shading and detail. Keep the brush slightly angled to the miniature's surface, allowing the wash to flow naturally into the recesses and details.
Understanding the properties of the wash and the surface it's being applied to will further aid in controlling the flow. A fast-drying wash will require a quicker application, while a slower-drying wash allows for more manipulation. Experimentation and practice are essential to mastering this technique and achieving the desired results, allowing you to create exceptional details on your miniatures.
Cleaning Up and Finishing Touches: Perfecting the Look
After applying the wash, ensure that any excess wash is removed from the miniature's surface. This can be accomplished with a brush or a soft cloth, carefully dabbing away any excess. Allow the miniature to dry completely before proceeding to the next step. This thorough cleaning process is essential for preventing smudging and maintaining a clean, crisp look. The final steps in your wash technique might involve adding highlights or subtle accents to enhance the details and bring out the miniature's features.
Taking the time to clean up after each step in the wash process is critical to maintain the integrity of your work. This attention to detail will elevate your miniature painting to a new level of quality. A precise and well-executed wash technique is a significant step in achieving that professional, detailed look in your miniatures.
Advanced Techniques for a Professional Finish
Layering for Depth and Dimension
Mastering layering is crucial for creating depth and dimension in your miniature paintings. This involves applying thin, translucent washes and glazes over base colours, progressively building up the form and highlighting details. Start with a base coat, then add layers of progressively darker or lighter colours, focusing on areas that need more definition. This technique allows you to subtly sculpt the miniature's form and create a sense of volume without overwhelming the details.
Careful consideration of colour values and transparency is key. Experiment with different mediums like acrylics or oils to achieve the desired effect. Practice on scrap paper or miniature models to develop your layering skills before applying them to your final painting.
Highlighting and Shading Techniques
Highlighting and shading are essential for creating visual interest and realism. Highlights are the brightest parts of a model, often achieved with a very light colour, while shadows add depth and contrast. These techniques are used in conjunction with layering to bring the miniature's form to life.
Using a fine brush, carefully apply highlights to the raised parts of the model, such as edges and protrusions. For shading, use darker colours to define recesses and crevices, and use a combination of techniques such as dry brushing or glazing to achieve the desired level of depth.
Using Dry Brushing for Texture and Detail
Dry brushing is a fantastic technique for adding texture and subtle details to your miniature. It involves using a brush with very little paint, allowing the paint to be applied in light, sweeping strokes that lightly dust the surface. This technique is perfect for creating the appearance of rough surfaces, like wood or stone, and bringing out intricate details on the model's surface that might otherwise be lost.
Use a dry brush technique to highlight the edges of armour plates, the crevices of terrain, or the patterns on fabric. The key is to use a light touch and a very light layer of paint to create a subtle but impactful effect.
Working with Multiple Colours and Colour Schemes
Exploring diverse colour schemes can significantly enhance the visual appeal of your miniature. Experiment with complementary, analogous, or triadic color schemes to create a harmonious and dynamic painting. Consider the overall theme and atmosphere you want to evoke when choosing your colours.
A well-chosen colour scheme can significantly impact the mood and atmosphere of your miniature. The choice of colors should reflect the setting and the era in which the miniature is set.
Achieving Smooth Transitions Between Colours
Smooth transitions between colours are essential for a professional finish. Avoid harsh lines and strive for a seamless blending of hues. Techniques like glazing, wet-on-wet blending, or layering can help achieve this effect.
Mastering smooth transitions is essential for creating a realistic and professional-looking miniature. Practice blending techniques on scrap paper or models before applying them to your final painting. This will enhance the overall aesthetic of the miniature and bring out its hidden details.
Advanced Techniques for Small Details
Working with small details on miniatures requires precision and patience. Using fine brushes and specialized tools can help achieve incredibly detailed and intricate work. Techniques like stippling, dry brushing, and applying very small amounts of paint can greatly enhance the overall quality of the miniature.
Practice with various fine brushes and tools to find the ones that best suit your needs. Experiment with different techniques to find what works best for you and your miniature models. The level of detail you can achieve with these techniques is truly impressive.
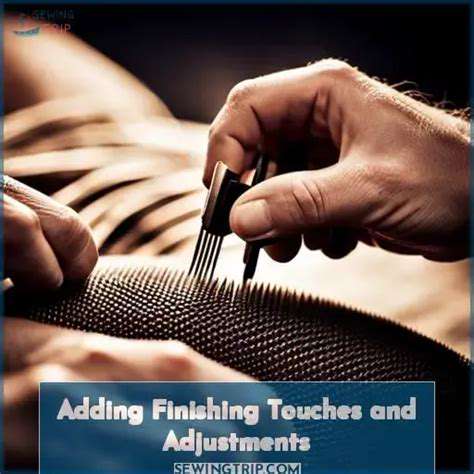
Finishing Touches and Final Adjustments
Finishing touches are crucial for a professional-looking miniature. This includes adding highlights and shadows, ensuring smooth transitions between colors, and checking for any imperfections. Consider using a varnish to protect the paint job and enhance its shine.
A final varnish coat will protect the paint job and add a professional finish. Careful attention to detail during the finishing stage can significantly enhance the overall appearance and longevity of your miniature painting.
Read more about How to Paint Miniatures for Board Games
![How to Play [Specific Card Game, e.g., Bridge]](/static/images/34/2025-05/AdvancedStrategiesandTechniques.jpg)