How to Crochet a Granny Square
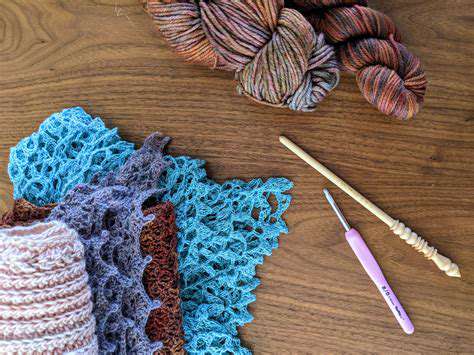
Yarn Selection
Choosing appropriate yarn requires balancing several factors. Fiber content affects drape and care requirements - acrylics offer durability while natural fibers provide luxurious texture. Consider the project's purpose: baby items demand softness, while decorative pieces can utilize more textured options.
For beginners, medium-weight (worsted) yarn in a light color proves most forgiving. The smooth texture shows stitch definition clearly, and the weight works up quickly without being bulky. Always purchase extra to ensure dye lot consistency across your project.
Hook Essentials
Crochet hooks come in various materials - aluminum provides smooth gliding, while ergonomic handles reduce hand fatigue. The size indicated on yarn labels serves as a starting point, but your personal tension may require adjustment. Keep multiple sizes on hand to test gauge.
Maintain a collection of basic sizes (3.5mm-6.5mm) to accommodate different yarn weights. Store hooks properly to prevent damage to the crucial throat and point areas.
Stitch Foundations
Beyond the basic stitches, understanding stitch anatomy improves technique. Recognize the front and back loops, post stitches, and how yarnovers affect stitch height. Practice maintaining even tension - neither too tight nor too loose.
Online video tutorials offer invaluable visual references. Bookmark several demonstrating the same technique from different angles to find the explanation that resonates with your learning style.
Additional Supplies
Beyond the basics, several tools enhance the crochet experience. Stitch markers help track rounds, especially in complex patterns. A row counter prevents losing your place, while a small crochet hook proves perfect for weaving in ends.
Organize supplies in a portable case for crocheting on-the-go. Include small scissors, a measuring tape, and a notebook for recording modifications or inspiration.
Setting Up
Create an ergonomic workspace with proper lighting and support. Position yourself so your elbows rest comfortably at your sides, preventing shoulder strain. Keep materials within easy reach to maintain workflow.
Develop a pre-crochet routine - winding yarn, reviewing patterns, and gathering tools. This preparation prevents interruptions that can lead to mistakes or frustration.
Troubleshooting
Common issues include uneven edges, inconsistent sizing, or accidental increases. Most problems stem from tension variations or miscounted stitches. Regularly compare your work to the pattern measurements.
When difficulties arise, set the project aside briefly. Returning with fresh eyes often reveals simple solutions. Online crochet communities offer supportive advice for specific challenges.
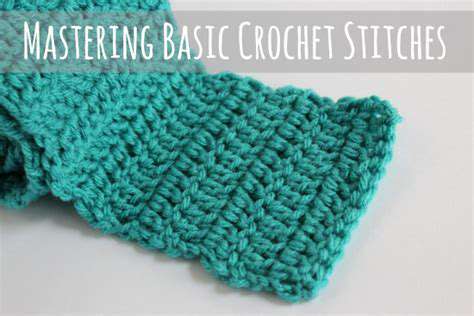
Mastering the Basic Crochet Stitches
Slip Knot Fundamentals
The slip knot serves as the anchor for all crochet work. Create it by forming a loop, pulling a second loop through, and tightening gently around the hook. The knot should slide smoothly but not loosen unexpectedly.
This deceptively simple technique establishes the foundation for every stitch that follows. Practice until you can create consistent tension without conscious thought.
Single Crochet Technique
The single crochet (sc) creates dense, sturdy fabric perfect for structured items. Insert the hook, yarn over, pull through (two loops on hook), yarn over again, and pull through both loops. The motion should flow smoothly from the wrist.
This versatile stitch works beautifully for borders, amigurumi, and textured patterns. Mastering sc tension control opens doors to countless project possibilities.
Double Crochet Mastery
Double crochet (dc) builds height quickly, making it ideal for afghans and garments. Yarn over before inserting the hook, then complete as a single crochet with an extra step. The rhythm becomes: yarn over, insert, yarn over, pull through, yarn over, pull through two, yarn over, pull through two.
This stitch's airy quality creates lightweight fabrics with beautiful drape. Practice maintaining even height across rows for professional results.
Combination Stitches
Advanced patterns often blend stitch types within rows. Transitioning smoothly between sc and dc requires adjusting your yarn tension and hook angle. Pay attention to where the hook enters each stitch - under both loops unless specified otherwise.
Create sampler swatches experimenting with stitch sequences. These exercises build the muscle memory needed for complex patterns.
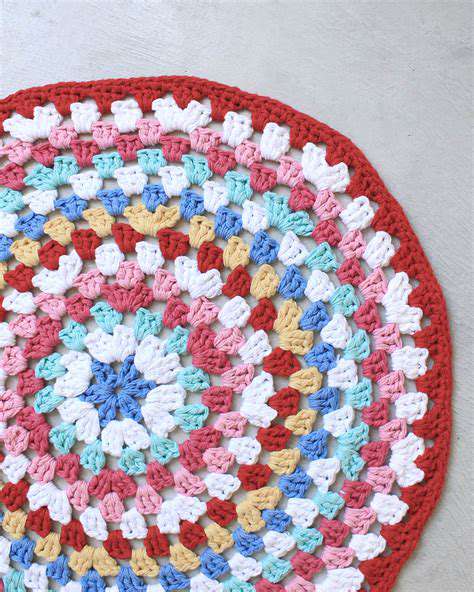
Crafting Your First Granny Square: The Pattern
Pattern Comprehension
The classic granny square pattern follows a logical progression. Begin with a center ring, then work outward in rounds of clustered stitches separated by chain spaces. Each corner typically contains a cluster-chain-cluster sequence.
Read through the entire pattern before starting. Highlight or mark repeats and special instructions. Understanding the construction logic helps when modifying or troubleshooting.
Round-by-Round Execution
Round 1 establishes the center with either a magic ring or chain loop. Rounds 2+ build outward, with increases occurring at each corner. Count stitches periodically to catch mistakes early.
Use stitch markers to denote the first stitch of each round, especially when working with solid colors. This simple trick prevents confusion and maintains the square shape.
Troubleshooting Shape Issues
If your square begins to cup or ruffle, check your stitch counts. Common errors include missing corner chains or accidental increases. Blocking can correct minor irregularities, but significant issues require frogging (undoing) back to the mistake.
Keep your first attempts as reference pieces. Comparing new squares to these helps identify improvement areas.
Tips for Success and Variations
Consistency Techniques
Develop a personal rhythm by counting stitches aloud or using a row counter. Maintain consistent yarn tension by wrapping the yarn around your fingers in a comfortable, repeatable manner.
Take breaks to prevent hand fatigue, which can alter tension. Stretch your hands and wrists regularly during extended crochet sessions.
Creative Variations
Experiment with different center shapes - try hexagons or circles for unique projects. Incorporate post stitches for dimensional texture or filet crochet for lace effects.
Seasonal color palettes can inspire themed projects. Nature often provides the most harmonious color combinations.
Project Planning
Before starting large projects, create a sample square to calculate yarn requirements. Wash and block this sample to check for shrinkage or color bleeding.
Sketch color arrangements or use digital tools to visualize final products. This planning prevents costly mistakes and ensures satisfying results.
Read more about How to Crochet a Granny Square

Hot Recommendations
-
*Best Sci Fi Books to Read in 2025
-
*How to Start a Reading Journal
-
*Guide to Collecting Vinyl Records by Genre
-
*Guide to Self Publishing Your Book
-
*Guide to Reading More Books
-
*How to Solve a Megaminx Fast
-
*Guide to Identifying Edible Plants While Hiking (Use Caution!)
-
*How to Solve a 5x5 Rubik's Cube
-
*Guide to Building Advanced Lego Structures
-
*How to Capture Star Trails Photography