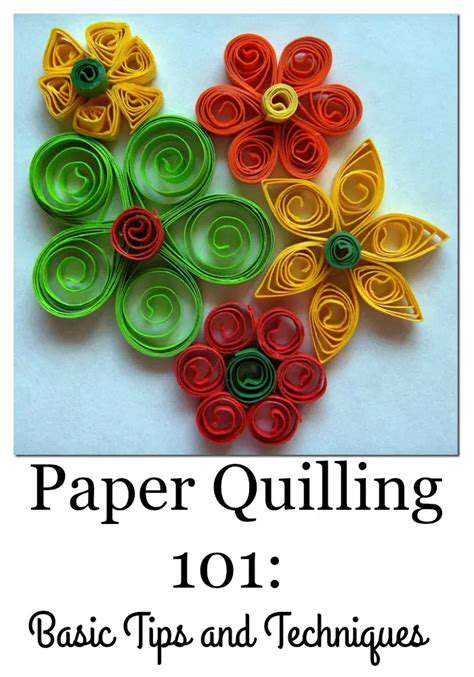
Guide to Paper Quilling Techniques
Essential Tools and Materials for Paper Quilling
Basic Supplies for a Quilling Journey
Starting your paper quilling journey requires a relatively modest collection of tools and materials. Essential items include quality paper strips, either pre-cut or for cutting yourself. The quality of the paper significantly impacts the final look and feel of your creations, influencing the flexibility and hold of the coils. Different weights and types of paper offer varying textures and appearances, so experimenting is key to discovering your preferences. You'll need a variety of tools for shaping and manipulating the strips, including a quilling tool, a set of quilling templates, or even just a toothpick. These tools aid in creating precise curls and shapes. Sharp scissors or a craft knife are crucial for accurately cutting the paper strips to the desired length and width. Finally, a workspace that allows for precise handling and prevents damage to your creations is also an important aspect of this activity.
Beyond the basics, consider investing in a good quality glue stick or a specialized quilling glue. A steady hand and patience are essential, as quilling demands precision and care in forming each coil. Additionally, having a selection of different colors and patterns of paper can open up creative opportunities. The more you experiment, the more you'll discover your preferred paper types and colors. Don't be afraid to explore different combinations of colors and patterns to create unique and captivating designs.
Advanced Quilling Tools and Techniques
As you progress in your paper quilling journey, you might find yourself drawn to more advanced tools and techniques. Investing in specialized quilling tools, such as a variety of bone or metal tools, can enhance precision and efficiency. These tools come in various shapes and sizes, enabling the creation of intricate designs and complex shapes. Different types of quilling tools are designed for specific coil sizes and shapes, and understanding these distinctions will help you achieve more advanced techniques. For instance, some tools are better suited for tight coils, while others allow for larger, bolder shapes. Mastering these tools will enable you to create more elaborate and impressive quilled creations.
Another important aspect of advanced quilling is exploring different techniques for shaping and arranging coils. Learning advanced techniques, such as creating more complex coils and elaborate designs, can elevate your projects. This might involve learning to create more complex shapes, such as flowers, animals, or intricate patterns. Advanced techniques also encompass using specialized templates or creating your own custom templates to aid in the construction of intricate quilled pieces. Further, working with multiple layers of paper and different colors and textures can lead to more visually appealing and striking creations.
Beyond the tools, practice and experimentation are key in mastering advanced quilling. By practicing various techniques and exploring different designs, you'll develop the skills and confidence to create intricate and impressive pieces. Learning to work with different paper types and textures, including metallic papers or papers with unique patterns, can greatly enhance your creative expression.
Experimenting with different coil sizes and combining various techniques will lead to unique and personalized quilled creations. Explore different quilling designs and patterns, drawing inspiration from various sources and developing your own unique style. There are numerous online tutorials and resources available to guide your exploration of advanced quilling techniques.
Having a dedicated work area with good lighting is also important for optimal performance when working with intricate designs. Having a variety of quilling tools and materials will allow you to explore different possibilities and develop your creative vision.
Basic Paper Quilling Techniques: Mastering the Fundamentals
Getting Started with Paper Quilling
Paper quilling, a fascinating craft, involves rolling and shaping thin strips of paper to create intricate designs. Mastering the fundamentals is essential for creating beautiful and detailed pieces. Begin by gathering your supplies, including colorful paper, tools like quilling tools or even a toothpick, and a workspace to avoid any accidental messes.
Understanding the different types of paper available is crucial. Different papers have varying textures and thicknesses, which affect how the quilled shapes will look. Experiment with different papers and find what works best for you.
Creating the Basic Quilled Shapes
The foundation of paper quilling lies in mastering the basic shapes. These include coils, loops, and rolls. Learning how to create these shapes correctly will allow you to construct more complex designs. Practice shaping the paper strips carefully and precisely.
Once you've mastered the basic shapes, you can start experimenting with different sizes and variations.
Rolling Techniques
Rolling techniques are the cornerstone of paper quilling. Understanding the various rolling methods, from tight spirals to loose curls, is paramount to crafting unique shapes. Careful handling of the paper strips is vital in achieving smooth and even rolls. Experiment with different rolling techniques and discover your preferred method.
Using Tools and Materials
Choosing the right tools and materials significantly impacts the quality of your quilling projects. High-quality quilling tools can make a noticeable difference in the precision and smoothness of your shapes. Invest in good quality tools to enhance your quilling experience. Also, consider the paper's thickness and texture, as these factors will influence the final look of your creation.
Designing and Assembling Your Quilled Pieces
Once you've mastered the basic shapes and rolling techniques, you can start designing and assembling your quilled pieces. Design inspiration can come from nature, patterns, or personal preferences. Planning your designs meticulously will ensure a cohesive and visually appealing final product.
Once you have a design in mind, carefully assemble the quilled shapes using glue or other suitable adhesives. Be mindful of the spacing and arrangement of the shapes to achieve the desired aesthetic.
Troubleshooting Common Issues
Even experienced quillers encounter challenges from time to time. Understanding common issues like paper breakage or uneven rolls will help you overcome them. Addressing these issues promptly and efficiently will prevent frustration and encourage creativity. Practice and patience are key to overcoming these hurdles.
Learning from mistakes and adapting your techniques will lead to improvement and greater mastery of the craft.
Before you even head out for your walk, taking a few preventative steps can significantly reduce the amount of mud your furry friend tracks into your home. Consider using booties or waterproof dog shoes. These specialized footwear options offer a barrier against the mud and dirt, keeping your dog's paws cleaner and your floors pristine. They are especially helpful for dogs with sensitive paws or those who frequently walk in particularly muddy areas.
Advanced Paper Quilling Techniques: Beyond the Basics
Embellishing Your Quilled Creations
Taking your paper quilling beyond simple shapes and forms requires a keen eye for detail and a willingness to experiment. Adding embellishments like tiny beads, sequins, or even tiny pieces of sculpted paper can transform a simple quilled design into a captivating piece of art. Consider using different colors and textures of paper to create depth and visual interest. This step truly opens up a world of possibilities for personal expression and creativity in your quilled pieces.
Experimenting with different types of embellishments is key. A single, strategically placed bead can anchor a design, while a cluster of sequins can add a touch of sparkle and glamour. Don't be afraid to mix and match materials; the possibilities are virtually endless. Remember, the key to successful embellishment is balance; too much can overwhelm the design, while too little might not provide the desired impact.
Creating Realistic Textures
One of the most fascinating aspects of paper quilling is its ability to mimic realistic textures. By carefully shaping and layering quilled strips, you can create the appearance of fur, feathers, or even flowing fabrics. This requires a good understanding of the different shaping techniques and a keen eye for detail. Practice with various paper thicknesses and textures to achieve the desired effect.
For example, creating a realistic fur effect involves using closely spaced, small quilled shapes. Layering these shapes and using a light-colored paper can bring a soft and fluffy appearance. The key is patience and precision in shaping and layering each piece to achieve the desired level of realism.
Advanced Shaping Techniques
Moving beyond basic coils and loops, advanced paper quilling techniques introduce a wider range of shapes and forms. These techniques often involve intricate layering, precise shaping, and skillful manipulation of the quilled strips. Mastering these advanced shaping techniques elevates your creations, allowing you to express more complex ideas and designs.
Learning to create complex shapes, like spirals, tightly wound roses, and even 3-dimensional forms, requires dedicated practice and a strong understanding of the underlying principles of paper quilling. Each shape demands a unique approach to the shaping and layering process. It is in these advanced techniques that the real artistry of paper quilling shines.
Designing Complex Patterns
Combining different quilled elements, shapes, and sizes creates a world of design possibilities. Creating complex patterns requires a good understanding of symmetry, proportion, and visual balance. Experimenting with color combinations and paper textures is also an important part of the process. The key to designing truly exceptional patterns is to combine knowledge of the different techniques and understand the principles of visual harmony.
Consider using different sizes of quilled elements to create depth and visual interest. Combining contrasting colors can also create a striking visual effect. It's important to plan the arrangement of your designs and how the different elements will work together to achieve the desired result. Experimentation is key to developing your unique design style.
Mastering Color and Texture Combinations
Color and texture play a crucial role in elevating the visual impact of your paper quilling pieces. Careful selection of colors and textures can evoke different moods and atmospheres. Experimenting with various paper types and colors, from pastels to vibrant hues, can create stunning contrasts or harmonious blends.
The choice of paper type can significantly impact the final look. For example, using a glossy paper can add a touch of sophistication and shine to your creation, while a textured paper can bring a unique dimension to the design. Exploring different color palettes and combinations will allow you to develop your own signature style and aesthetic in paper quilling.
Creating 3-Dimensional Quilled Pieces
Moving from flat designs to three-dimensional pieces marks a significant step in your paper quilling journey. This involves creating layers and structures, carefully arranging shapes, and understanding how the different elements will interact to form a cohesive whole. Mastering 3D techniques allows for a whole new level of artistry and expression in paper quilling.
Creating 3D structures requires precision in shaping and arranging your quilled elements. Consider using a variety of tools and techniques, such as glue, wire, or other support materials, to create intricate forms. The possibilities for artistic expression are almost limitless with the ability to create quilled pieces that stand out in three dimensions.
Applying Paper Quilling to Crafting Projects: Inspiration and Ideas
Getting Started with Paper Quilling
Paper quilling, a fascinating craft, involves meticulously rolling and shaping thin strips of paper to create intricate designs. It's a rewarding process that allows for a great deal of creativity and precision. Beginners often find the intricate nature of the craft quite appealing, but the satisfaction of seeing a beautiful design come to life through careful manipulation is a truly remarkable experience, providing hours of enjoyment and a sense of accomplishment.
The beauty of paper quilling lies in its versatility. It can be used to embellish a wide range of crafting projects, from cards and invitations to picture frames and decorative boxes. This accessible craft opens up a world of possibilities for personalization and artistry, allowing you to add a unique touch to your creations.
Essential Tools and Materials
To embark on your paper quilling journey, you'll need a few key tools and materials. Essential items include various sizes of quilling tools, often in sets, for shaping the paper strips, along with a good quality selection of colorful paper strips. Glue is also necessary for securing the shaped pieces, and a workspace where you can comfortably work without worrying about disturbances is essential for maintaining focus.
Basic Quilling Techniques
Mastering a few fundamental quilling techniques is crucial for creating beautiful designs. These include techniques such as the basic roll, the loop, and the cone. Learning these techniques allows you to build upon them, creating more complex and elaborate designs, and unlocking the potential of this craft. Each technique builds upon the last, allowing you to progressively expand your skills.
Design Inspiration: From Simple to Complex
Paper quilling designs range from remarkably simple to incredibly complex, allowing for a great deal of creativity in your designs. Simple designs, such as flowers and leaves, are excellent starting points for beginners, while more elaborate patterns, such as intricate animals or abstract shapes, allow for a more advanced level of skill. Drawing inspiration from nature, or even from abstract art, can unlock a wealth of possibilities.
Creating Cards and Invitations
Paper quilling is an excellent choice for enhancing cards and invitations. Adding intricate designs to cards can make them more visually appealing and personalized. Using this craft, you can create custom designs for invitations that stand out from the crowd, setting the tone and style of the event, and conveying a sense of uniqueness and elegance.
Decorating Picture Frames and More
Beyond cards and invitations, paper quilling can be used to embellish picture frames, mirrors, and other decorative items. Adding a touch of elegance and personality to these items can transform them from ordinary to extraordinary. This allows you to put your own artistic touch on your home decor, creating a uniquely personalized space.
Exploring Advanced Quilling Techniques
As you gain proficiency in paper quilling, you can explore more advanced techniques, such as creating three-dimensional objects, intricate patterns, and complex designs. Experimenting with different techniques and approaches can unlock new possibilities and help you create truly unique and captivating pieces of art. The possibilities are endless, and the journey of exploration is part of the fun.
Read more about Guide to Paper Quilling Techniques


Hot Recommendations
-
*Best Sci Fi Books to Read in 2025
-
*How to Start a Reading Journal
-
*Guide to Collecting Vinyl Records by Genre
-
*Guide to Self Publishing Your Book
-
*Guide to Reading More Books
-
*How to Solve a Megaminx Fast
-
*Guide to Identifying Edible Plants While Hiking (Use Caution!)
-
*How to Solve a 5x5 Rubik's Cube
-
*Guide to Building Advanced Lego Structures
-
*How to Capture Star Trails Photography