Crafting with Resin: Safety Tips
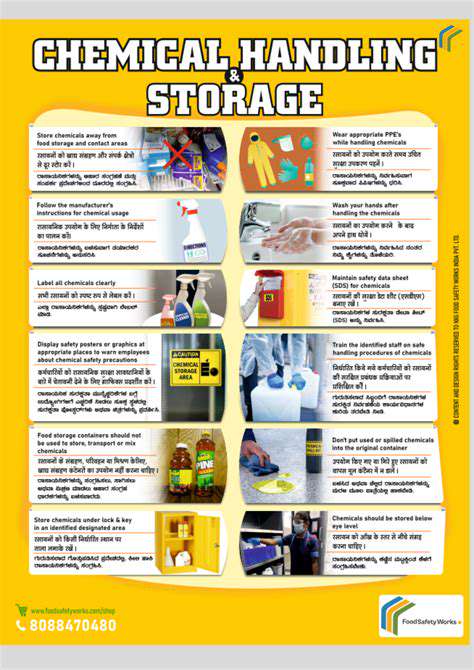
Essential Safety Gear
Resin safety demands comprehensive protection. A properly fitted NIOSH-approved respirator is essential when working with pigmented resins or during extended sessions. Chemical-resistant aprons provide additional protection against spills and splashes. Always keep a box of disposable gloves near your workspace for quick changes.
Eye protection should meet ANSI Z87.1 standards for impact resistance. Consider using a face shield when sanding or drilling cured resin. Proper ventilation can be achieved with box fans in windows or dedicated fume extraction systems.
Proper Workspace Setup
An ideal resin workspace features non-porous surfaces like stainless steel or sealed concrete. Dedicate specific tools to resin work to prevent cross-contamination. Organize materials in clearly labeled, airtight containers to prevent accidental spills and maintain freshness.
Create designated clean and dirty zones in your workspace. The clean area should contain only prepared materials, while the dirty zone handles mixing and potential spills. This separation minimizes contamination risks.
Handling Resin Safely
Always mix resins in well-ventilated areas using precise measuring tools. Never guess measurements - inaccurate ratios can create unstable chemical reactions. Mix slowly to minimize air bubble formation, scraping the sides and bottom of containers thoroughly.
Dispose of mixing sticks and cups immediately after use. Never reuse contaminated tools, as partially cured resin can affect new mixtures. Keep acetone or appropriate cleaners nearby for quick spill management.
Emergency Procedures
Prepare for resin emergencies before they occur. Keep an eye wash station and chemical shower accessible. Know the location of your nearest medical facility that handles chemical exposures. For skin contact, wash immediately with soap and cool water - never use solvents on skin.
Ventilate the area immediately if fumes become overwhelming. Have someone check on you periodically during long resin sessions. Post emergency numbers visibly in your workspace, including poison control contacts.
Emotional awareness plays a vital role in creative pursuits like resin art. Recognizing your physical and mental state before working with hazardous materials prevents accidents caused by distraction or fatigue.
Proper Resin Handling and Disposal
Safe Handling Practices
Resin handling requires mindfulness at every step. Work in spaces where you can control airflow - basement workshops often need additional ventilation. Never eat or drink in resin work areas to prevent accidental ingestion. Store resin containers upright in temperature-stable environments.
When measuring, pour carefully to avoid splashing. Use separate, clearly labeled measuring cups for resin and hardener. Clean spills immediately with appropriate solvents, wearing protective gear during cleanup.
Proper Disposal Procedures
Dispose of resin waste responsibly. Small amounts can be cured in disposable containers before landfill disposal. Larger quantities may require hazardous waste disposal services. Never pour liquid resin into trash - it can leak and create dangerous situations.
Recycle empty resin containers only after thorough cleaning. Some manufacturers offer take-back programs for used containers - check with your supplier. Always cure leftover resin before disposal to prevent environmental contamination.
Resin Safety Considerations
Understand potential long-term exposure risks. Chronic exposure to resin fumes may cause respiratory sensitization. Implement a buddy system when working with large quantities or in confined spaces.
Monitor yourself for symptoms like headaches or dizziness. These may indicate inadequate ventilation. Consider using air quality monitors in your workspace to detect dangerous fume buildup before symptoms appear.
Curing and Storage of Resin Projects
Curing Processes
Curing transforms liquid resin into durable finished pieces. Rushing the curing process often leads to soft spots or surface defects. Follow manufacturer timelines precisely - adding heat to speed curing can cause cracking or yellowing.
Monitor curing projects regularly. Some resins benefit from being covered during early curing stages to prevent dust contamination. Avoid moving pieces until fully cured to prevent distortion.
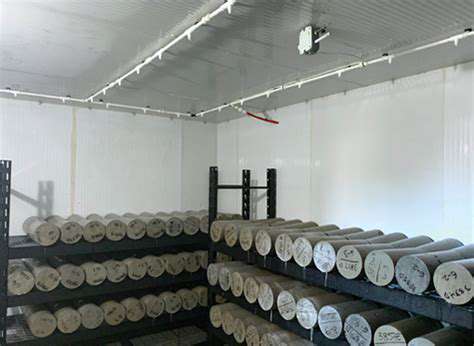
Storage Considerations
Store cured resin pieces away from direct sunlight to prevent yellowing. Temperature fluctuations can cause cured resin to expand and contract, potentially leading to cracks. Wrap delicate pieces in soft cloth before boxing for added protection.
For long-term storage, use archival-quality materials. Acid-free tissue paper prevents surface reactions. Silica gel packets help control humidity in storage containers.
Packaging and Handling
When shipping resin pieces, use ample cushioning material. Bubble wrap should never directly contact resin surfaces - it can leave permanent impressions. Consider using foam-lined boxes for valuable pieces.
Label packages containing resin art as fragile and temperature sensitive. Include handling instructions if pieces require specific orientation during transport. For large pieces, build custom crates with proper internal support.
Read more about Crafting with Resin: Safety Tips


Hot Recommendations
-
*Best Sci Fi Books to Read in 2025
-
*How to Start a Reading Journal
-
*Guide to Collecting Vinyl Records by Genre
-
*Guide to Self Publishing Your Book
-
*Guide to Reading More Books
-
*How to Solve a Megaminx Fast
-
*Guide to Identifying Edible Plants While Hiking (Use Caution!)
-
*How to Solve a 5x5 Rubik's Cube
-
*Guide to Building Advanced Lego Structures
-
*How to Capture Star Trails Photography